Experimenting with WordPress is one thing which I love to do it,I always reach out for testing a new plugins and themes for my blogs.
Instead of directly testing on my Production server,I always test it on a local WordPress profile.Which is a kind of dummy setup to experiment any plugins or major Design changes before implementing it on my blog.
There were several other advantages of using Dummy WordPress setup,like you need not to be connected with Internet always and your local WordPress setup will be much faster to work with.
Not only WordPress,Once you installed Web server you can also work with several other CMS like Drupal,Joomla etc.Also,It wont take much time for setup.
So are you ready to get started with it ?
Setting up a Local Web server depends on your Operating System.It is very easy to setup on MacOS and Windows but it takes much Higher Learning curve to setup on Linux .
So I wont be covering the setup process for Linux OS in this guide.( Don’t worry Linux fans,I will come up with separate guide for Linux )
For MacOS
There were several software packages available ,which installs web server components like Apache,PHP,PhpMyAdmin,MYSQL etc.
MAMP is one such software for MacOS.MAMP stands for Mac,Apache,MySql and PHP.
Thank God…You need not to pay for this software (hmm…partially) .
You can download MAMP from here.It also comes with PRO version but for a local use you don’t need it.
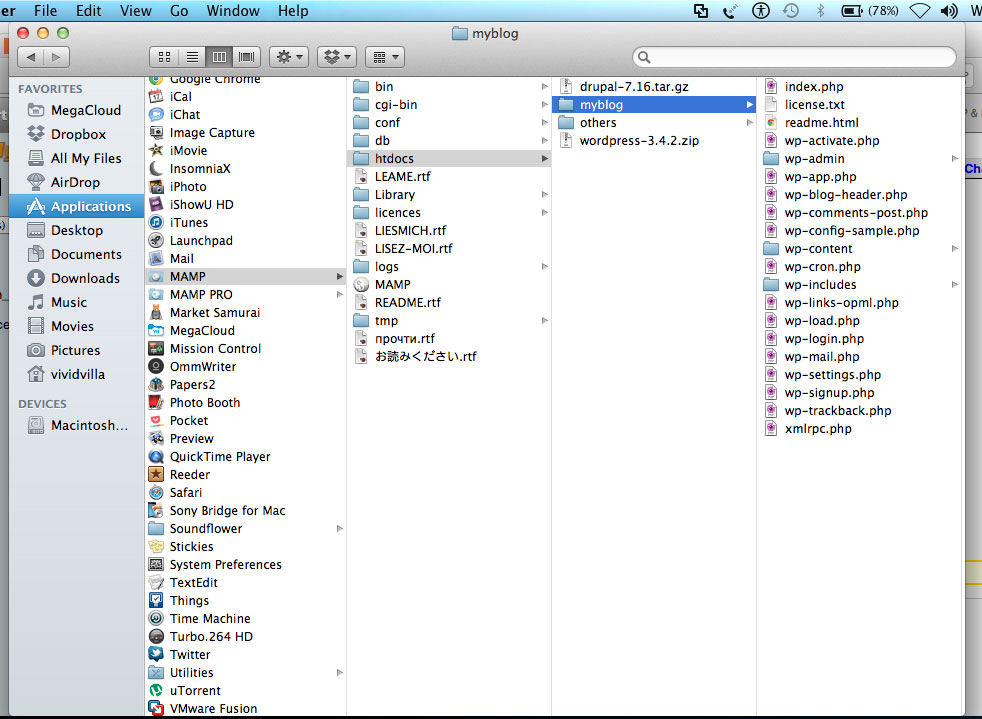
After Installation of MAMP,Extract the latest WordPress in following folder
Applications >> MAMP >> htdocs
It’s better to rename the extracted folder.Since the name of the folder is going to be your address for your test site.If you didn’t get this step refer to screenshot gallery that I have given below.
Now launch MAMP from Launchpad.You get a interface to configure MAMP preferences and option to start the servers.
Now if you Start the server the button red colored button besides Apache and Mysql server will become green colored [ Refer screenshot 2 below ].simultaneously,your browser will be automatically opened with a default interface.
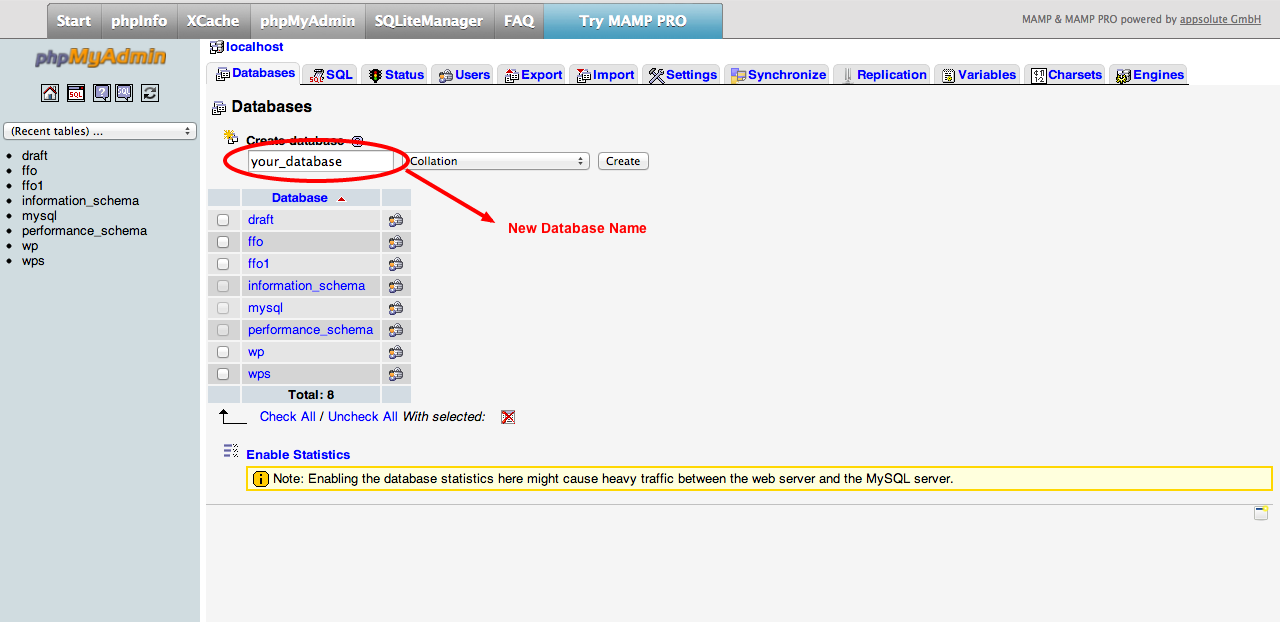
You can create a Database by visiting PhpMyAdmin option though the default interface.[ Refer Screenshot 3 and 4 ]
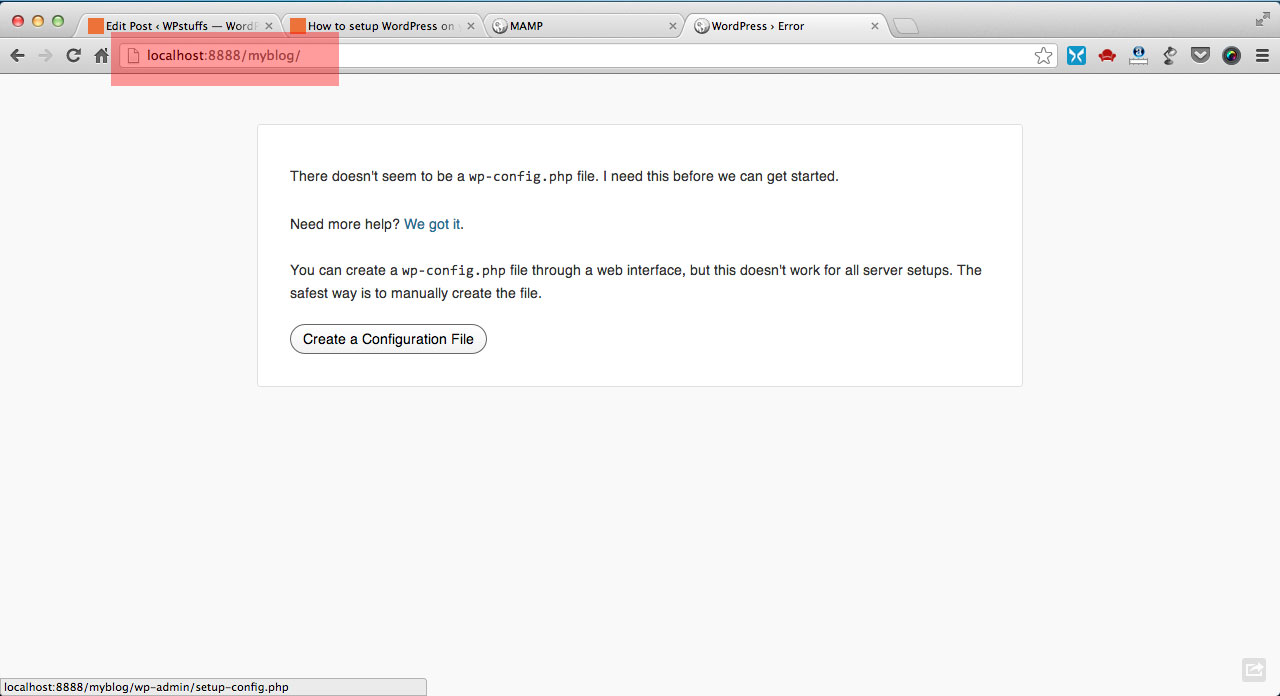
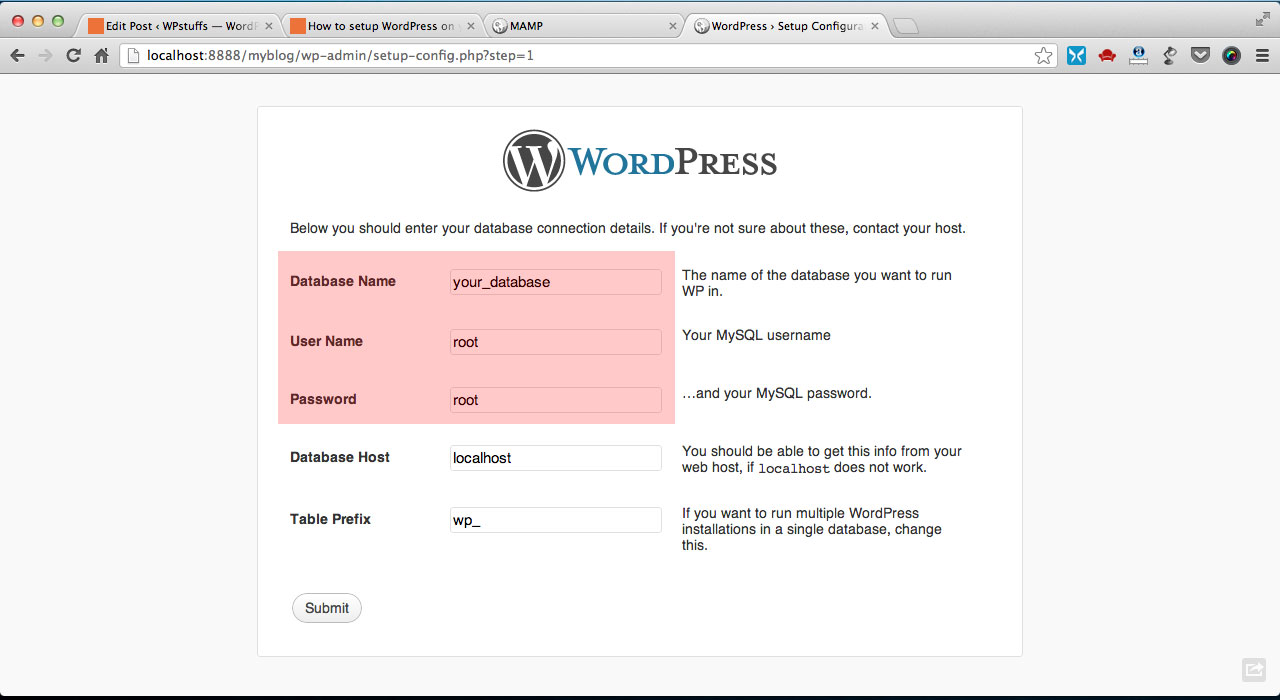
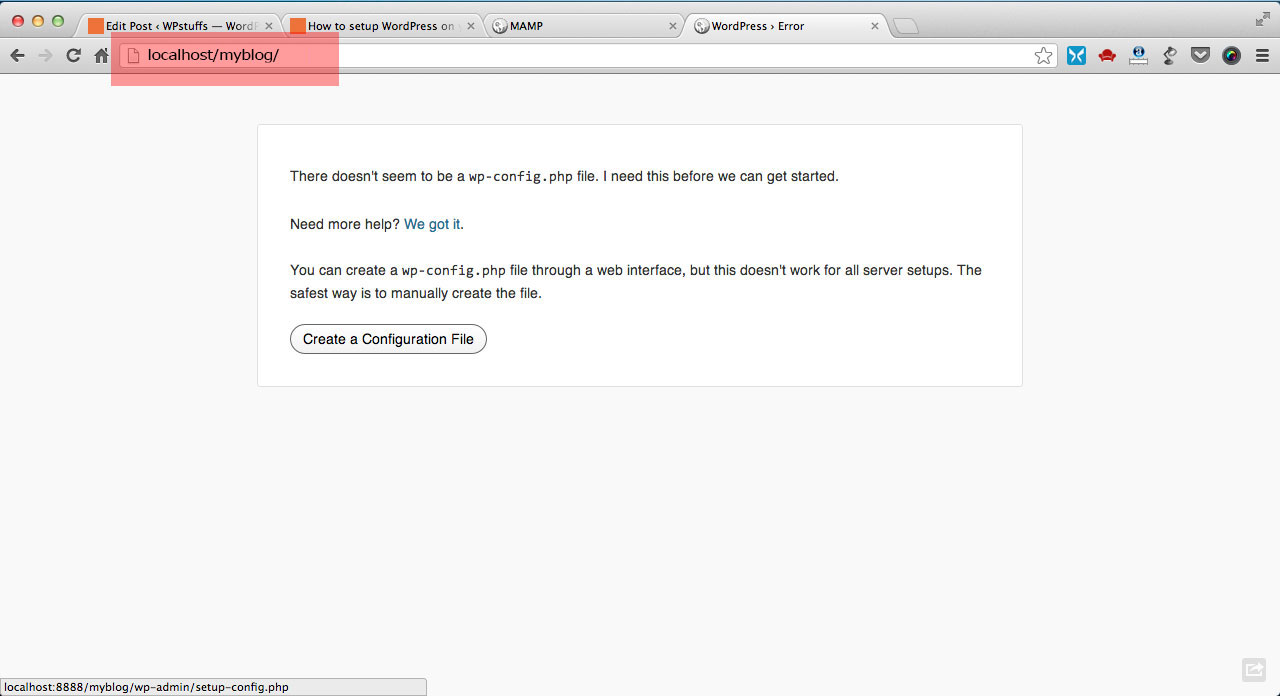
Its time to setup WordPress !!! Visit the following URL in your browser
http://localhost:8888/folder_name/
Replace the folder_name with the extracted WordPress folder name in htdocs folder.
Now you can see the option to proceed with the usual WordPress installation [Refer to screenshot 5 and 6]
Note that the default user name for your database is root and default database password is also root.
Here is a step by step screenshots for MacOS
-

- 1. Extract WordPress in htdocs
-
- 2. Start MAMP

-
- 3. Open PhpMyAdmin

-
- 5. Create New Database via PhpMyAdmin
-
- 5. Vist your WordPress Setup
-
- 6. Setup WordPress Database
For PC (Windows)
Installing Web server on PC is similar to Mac just the software differs.Download XAMPP web server and Install it. Here is a Official Guide for installing XAMPP with installer.
Note : You also have XAMPP for Linux and Mac.Try it out,If you are very curious.For Linux this is not a best method to setup WebServer but it is one of the easiest.
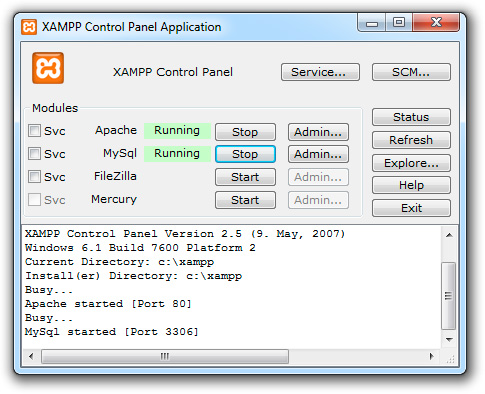
Now Start the XAMPP web server after launching the XAMPP application though Applications Menu. [refer below screenshot 1]
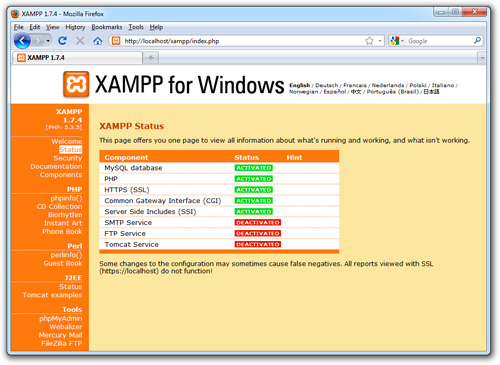
Now visit the following URL in your browser
http://localhost/
You will get the XAMPP management page where you can access the PhpMyAdmin for creating new database.
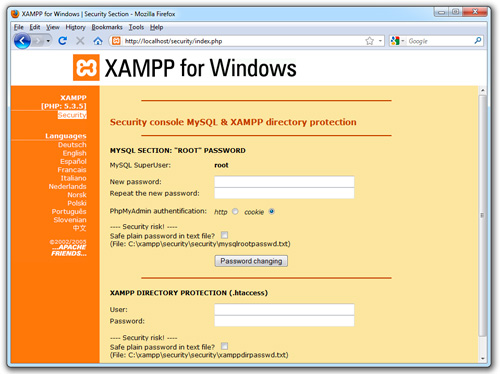
First you have to setup a password for user default user ‘root’ .You can do this by visiting http://localhost/security/ [Refer Screenshot 2 below]
Now you can able to create a new database by visiting http://localhost/phpmyadmin .For login Use username as root and password which you set in above step.
Install WordPress
Extract the WordPress Installation file in htdocs folder which will be located in XAMPP installation folder.
Now visit the following URL in your browser
http://localhost/folder_name/
Replace folder_name with your extracted WordPress folder name at htdocs folder.Now you can continue with usual WordPress Installation.[Refer to below screenshots]
Here is a step by step Screenshots for PC.
-
- 1. Start XAMPP
-
- 2. XAMPP Configuration Menu
-
- 3. Change PhpMyAdmin Password for root
-
- 4. Create Database via PhpMyAdmin

-
- 5. Create New Database via PhpMyAdmin
-
- 6. Visit WordPress Setup
Taking over to you
I Hope this tutorial helps you.if you have any queries or feedback regarding this article,P.S share below through comments.
You can subscribe our newsletter to get latest WordPress stuffs and Tutorials.